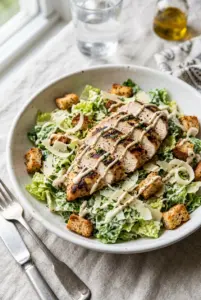
Grilled chicken Caesar salad hits that sweet spot between crisp, creamy, smoky, and salty in one bowl. The chicken brings a little char and juiciness, the romaine stays cold and snappy, and the dressing clings to every leaf without turning the whole salad heavy. When it’s built well, it eats like a proper dinner, not a side dish pretending to be one.
What makes this version work is the balance. The chicken gets pounded even so it cooks at the same pace from edge to center, and the smoked paprika gives the grill marks a deeper flavor than plain salt and pepper alone. The dressing leans on mayonnaise for body, then gets sharpened with lemon, Worcestershire, Dijon, and a small amount of anchovy paste for that classic Caesar backbone.
Below you’ll find the little details that keep the salad crisp, the chicken juicy, and the dressing from tasting flat. The order matters here, especially when you’re trying to keep the romaine from going limp before it reaches the table.
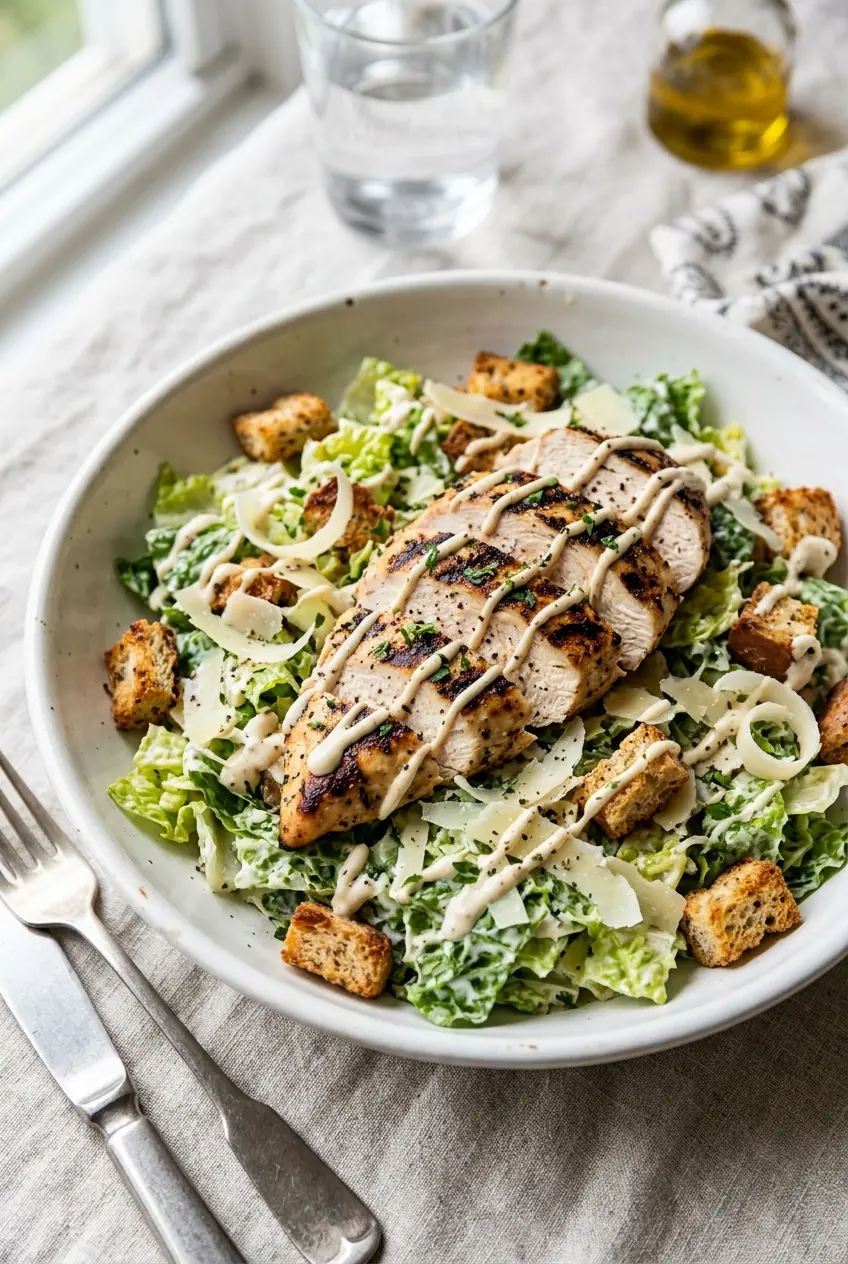
The dressing was thick enough to coat the romaine without puddling at the bottom, and the grilled chicken stayed juicy after the rest. My husband said it tasted like a restaurant Caesar, only better because the croutons stayed crunchy.
Grilled Chicken Caesar Salad with smoky chicken, crisp romaine, and a bold homemade Caesar dressing belongs in your dinner rotation. Save it for the nights when you want a full meal salad that still feels worth sitting down for.
The Step That Keeps the Chicken Juicy Instead of Dry and Stringy
Even cooking starts before the chicken hits the grill. When the breasts are left thick on one end and thin on the other, the thin edge dries out by the time the center is safe, and that’s usually why grilled chicken salads disappoint. Pounding them to an even thickness gives you a wider window where the meat stays tender and the outside can still pick up color.
Resist the urge to press the chicken with a spatula. That pushes out the juices you’re trying to keep inside, and it also flattens the grill marks into something pale and uneven. Pull the chicken when it reaches 165°F, then let it rest for five minutes so the juices settle instead of running across the cutting board.
- Even thickness — This matters more than marinade here. Uniform pieces cook at the same rate, which is what keeps the sliced chicken moist all the way through.
- Smoked paprika — It gives the chicken a deeper, slightly charred flavor without needing a long marinade. Regular paprika works in a pinch, but you lose some of that grill-side warmth.
- Romaine — Use heads that feel crisp and heavy for their size. Limp lettuce turns this salad from bright and crunchy to flat fast.
What Each Ingredient Is Actually Doing in This Salad
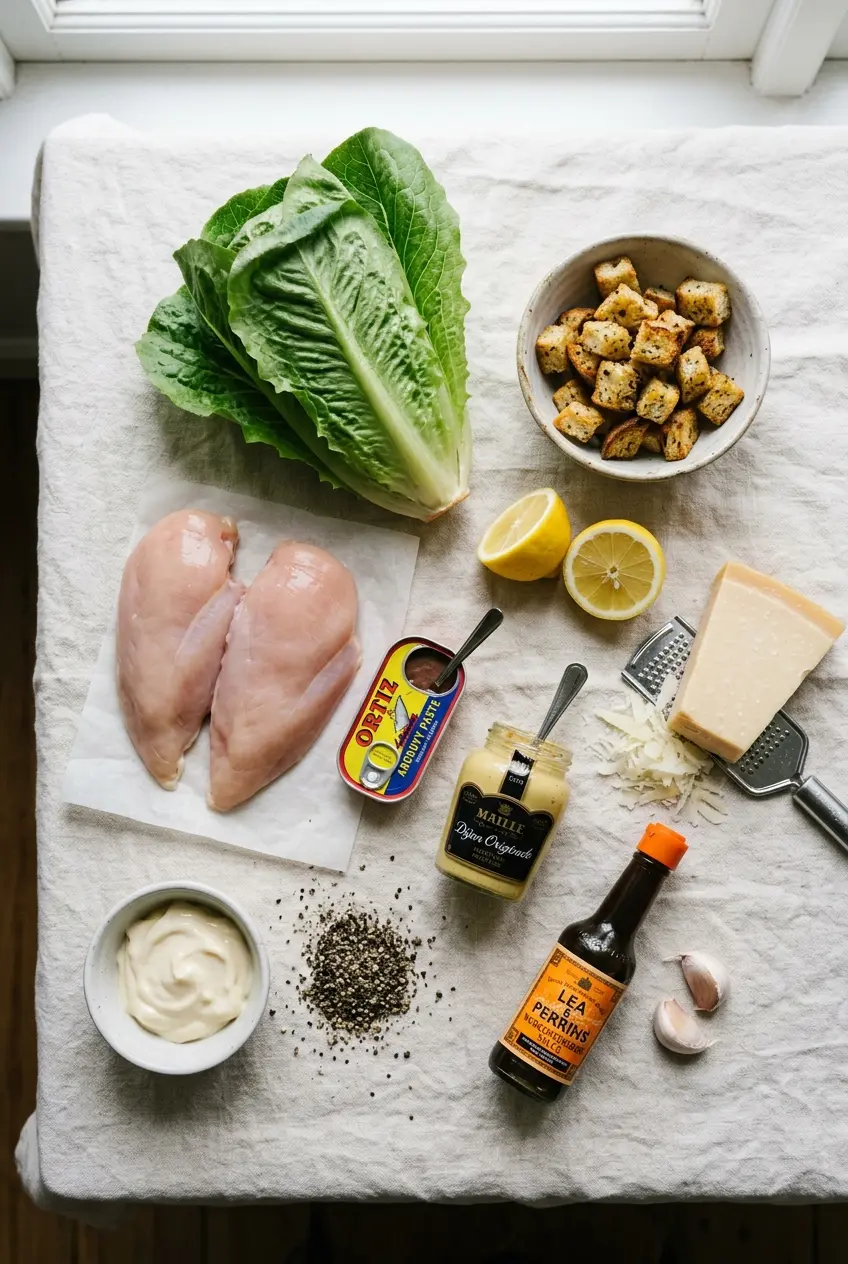
- Mayonnaise — This is the base that gives the dressing body and helps it cling to the lettuce. If you swap in yogurt, the dressing gets tangier and lighter, but it won’t have quite the same creamy Caesar feel.
- Anchovy paste — You don’t taste fish; you taste depth. It’s the ingredient that makes the dressing read like Caesar instead of lemony Parmesan mayo, and a little goes a long way.
- Worcestershire and Dijon — These sharpen the dressing and keep it from tasting one-note. Worcestershire adds savory complexity, while Dijon helps emulsify everything so the dressing stays smooth.
- Finely grated Parmesan — The fine grate melts into the dressing and seasons it from the inside. Shaved Parmesan at the end is for texture and presentation, so don’t skip the larger shards if you want the salad to look finished.
- Croutons — Store-bought is fine here if you want convenience, but homemade croutons hold up better because you can toast them until they’re deeply crisp. Soggy croutons are the fastest way to lose the salad’s contrast.
Building the Bowl So the Lettuce Stays Crisp
Season and Grill the Chicken
Brush the chicken with olive oil, then coat it with garlic powder, smoked paprika, salt, and pepper. The oil helps the seasoning stick and gives the surface enough fat to brown instead of drying out. Grill over medium-high heat for 5 to 6 minutes per side, depending on thickness, and leave it alone while it cooks. If the chicken sticks badly when you try to turn it, it isn’t ready to flip yet.
Whisk the Dressing Until It Turns Smooth and Bold
Combine the mayonnaise, lemon juice, Worcestershire sauce, garlic, Dijon, and anchovy paste until the mixture looks creamy and even. Then fold in the Parmesan and black pepper. If the dressing seems too thick to coat the romaine, add a teaspoon of water at a time; if it’s thin and slippery, it won’t cling to the leaves. Taste it before you dress the salad because Caesar dressing should be punchy enough to season the greens on contact.
Toss in Stages, Not All at Once
Start with half the dressing and toss the romaine until every leaf has a light coating. Add the croutons after the first toss so they stay crunchy instead of soaking up dressing from the bowl. Once the chicken is sliced, fan it over the top and finish with shaved Parmesan and a final drizzle of dressing. Serve immediately, because dressed romaine collapses fast and the whole texture of the salad depends on that crisp first bite.
Three Ways to Make This Caesar Work for Your Table
Gluten-Free Caesar Salad
Swap in gluten-free croutons or make your own from gluten-free bread. The rest of the salad is naturally gluten-free as long as your Worcestershire sauce is labeled accordingly, so this one is an easy adaptation without losing the classic texture.
Dairy-Free Version
Use a dairy-free Parmesan-style alternative and keep the dressing base as written, or swap the Parmesan for nutritional yeast if you want a sharper, nuttier finish. The result won’t be identical, but it still gives you that savory Caesar backbone.
Chicken Thigh Swap
Boneless skinless chicken thighs work well if you want a richer, juicier bite. They need a little extra time on the grill and benefit from trimming excess fat, but the flavor is deeper and they’re more forgiving if you accidentally cook them a minute too long.
Storage and Reheating
- Refrigerator: Store the chicken, dressing, lettuce, and croutons separately for up to 3 days. Once dressed, the romaine softens fast and the croutons lose their crunch.
- Freezer: The cooked chicken freezes well for up to 2 months. The dressing and lettuce don’t freeze well, so keep those fresh.
- Reheating: Reheat the chicken gently in a skillet over low heat or in the microwave in short bursts. High heat dries the meat out, and cold chicken straight from the fridge takes the shine off the salad.
Answers to the Questions Worth Asking
Coconut Lime Icebox Cake with Mango Ribbons
Ingredients
Equipment
Method
- Open the refrigerated full-fat coconut cream cans without shaking, then scoop only the solid cream from the top into a chilled bowl (discard the liquid or save for smoothies). Beat with an electric stand mixer on medium-high for 2 minutes until light and fluffy; no temperature is needed.
- Add the powdered sugar, lime zest, lime juice, and vanilla extract, then beat for 30 seconds until incorporated and smooth.
- Use a vegetable peeler to shave the mangoes into long thin ribbons, working around the pit. Set the ribbons aside on paper towels to release water while you assemble the cake.
- Spread a thin layer of coconut cream on the bottom of a 9x13 pan. Lay the graham crackers in a single layer, breaking them as needed to fill gaps.
- Spread one-third of the remaining coconut cream evenly over the crackers, reaching the edges so the layer is uniform.
- Repeat with two more layers of graham crackers and coconut cream, finishing with a cream layer on top. Smooth the surface with an offset spatula.
- Refrigerate uncovered for at least 6 hours or overnight so the graham crackers absorb moisture and soften into a cake-like texture. Keep chilled; a cake pulled at about 4 hours will still have crunch.
- Just before serving, arrange the mango ribbons in loose folds across the top, scatter the toasted shredded coconut, and finish with fresh mint leaves. Slice with a sharp knife dipped in hot water and wiped clean between cuts.