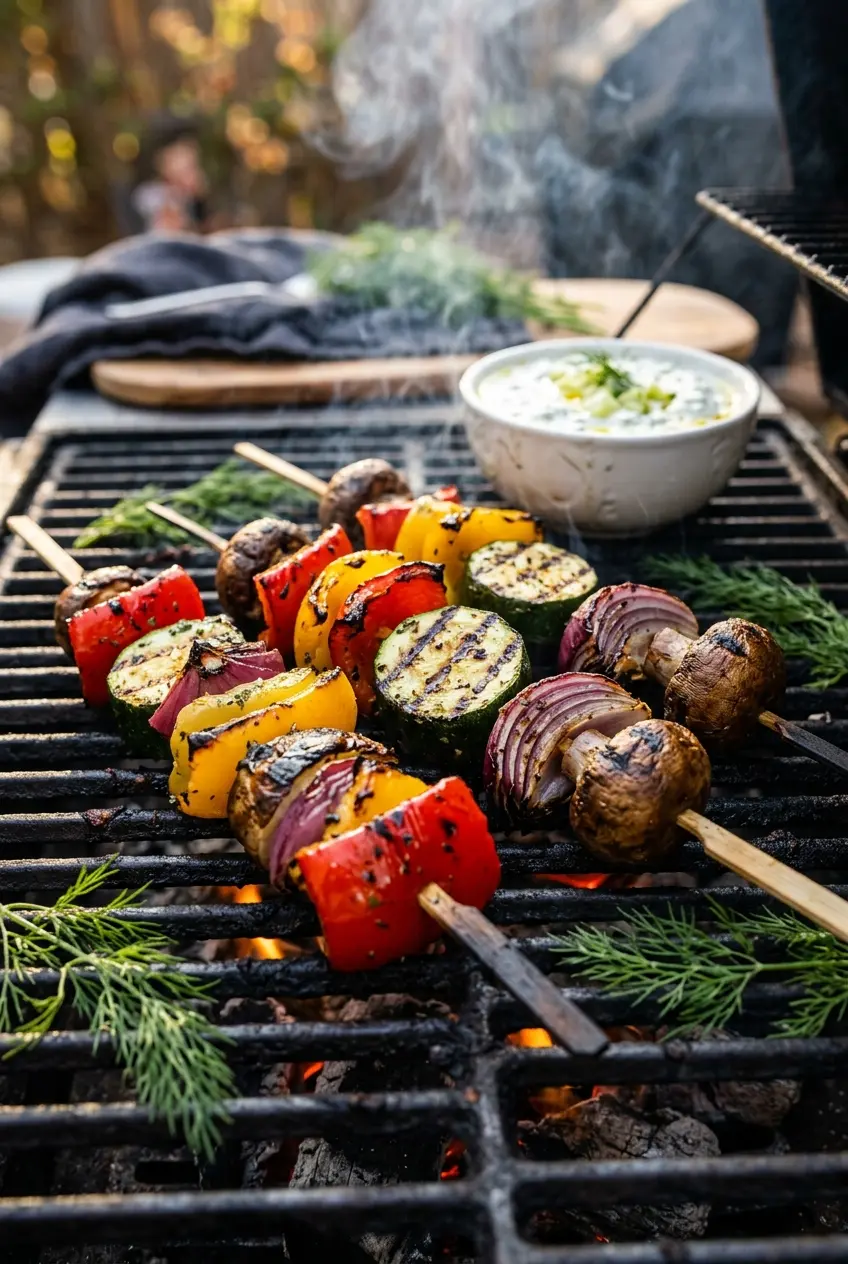
Charred grilled veggie skewers have a way of disappearing fast when they come off the grill with those crisp edges, smoky spots, and just-tender centers. The vegetables keep their own shape, the tomatoes burst a little, and the cool tzatziki beside them gives every bite a sharp, creamy finish that makes the whole plate feel complete.
What makes this version work is the contrast. The vegetables are coated in enough olive oil and seasoning to pick up color instead of drying out, and the skewers are spaced so the heat can actually reach the surfaces. The tzatziki starts with cucumber that’s squeezed nearly dry, which matters more than most people think — watery cucumber turns the dip loose fast.
Below, you’ll find the grill timing that keeps the vegetables from collapsing, plus the one prep step that keeps the tzatziki thick enough to cling to every bite. If you’ve ever had veggie skewers that tasted good but ate limp, this method fixes that.
The cucumbers in the tzatziki stayed thick instead of watery, and the skewers picked up perfect grill marks without turning mushy. I served them with pita and everyone kept going back for more sauce.
Save these grilled veggie skewers with tzatziki for your next cookout — the charred vegetables and cool garlic-dill dip are built for warm-weather dinners and easy entertaining.
The Grilling Mistake That Turns Veggies Soft Instead of Charred
The difference between good vegetable skewers and soggy ones comes down to spacing and heat. If the pieces are packed tight, they trap steam and soften before they ever brown. Leave a little room between each piece, and the grill can hit the surfaces directly.
High heat matters here too. You want the outside to pick up dark marks before the insides go mushy. That’s why the timing stays short and the turning stays frequent; long, slow grilling sounds gentle, but it works against the texture you want.
Cherry tomatoes are the one piece that needs a little attention. They can split early, which is fine, but if they’re wedged too close to wetter vegetables they’ll steam everything around them. Keep them balanced across the skewers so each one gets a bit of direct heat.
What Each Ingredient Is Actually Doing in These Skewers
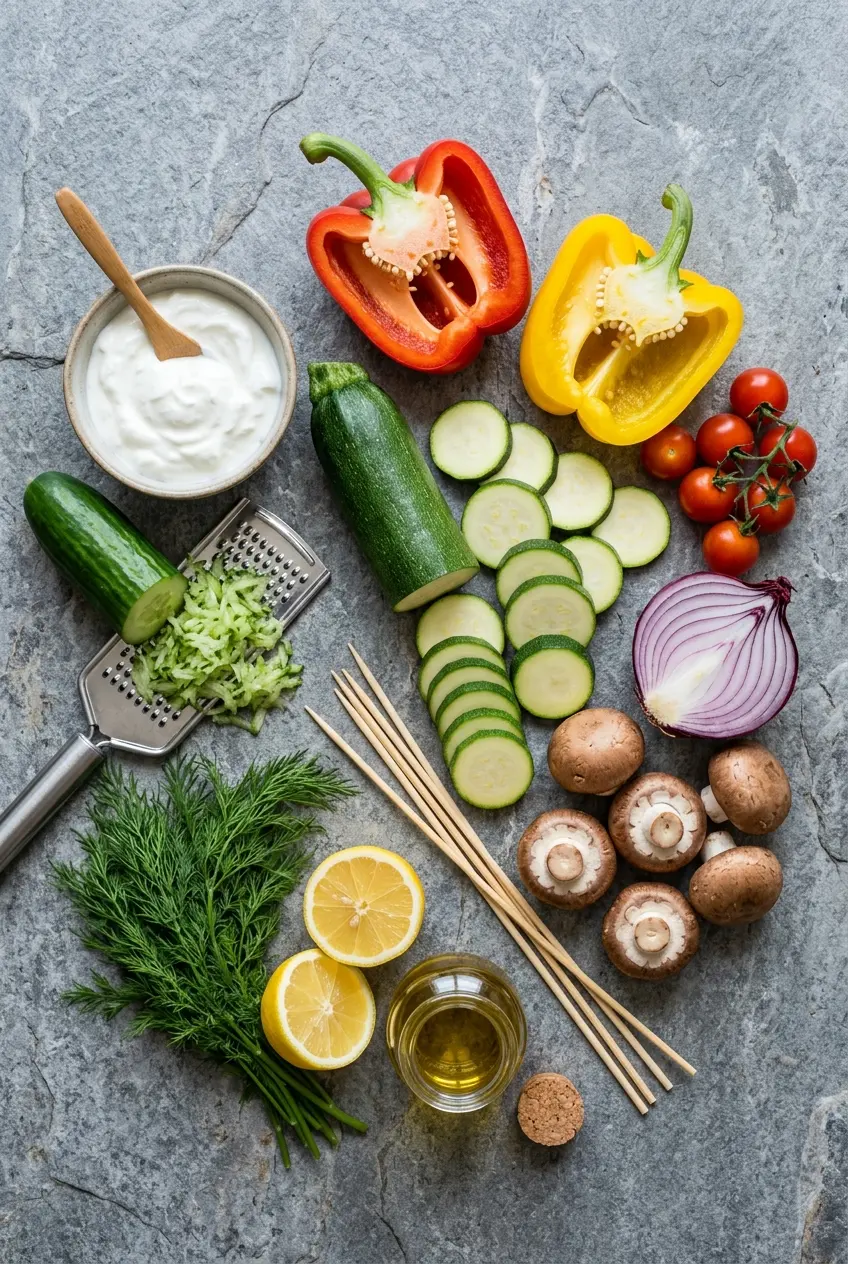
- Greek yogurt — Full-fat yogurt gives the tzatziki body and a clean tang that stays creamy after chilling. Low-fat yogurt works, but it tends to loosen faster and taste thinner.
- Cucumber — This is where the dip can go wrong. Squeezing it dry keeps the yogurt thick instead of watery, and that step matters more than the exact size of the grate.
- Olive oil — The oil on the vegetables helps the seasoning cling and encourages browning. In the dip, a small amount adds gloss and rounds out the garlic.
- Cremini mushrooms — These hold up well on the grill and soak in the seasoning without falling apart. If you use larger mushrooms, keep them whole only if they’re similar in size to the other vegetables.
- Smoked paprika and oregano — This combination gives the vegetables a warm, savory edge that reads Mediterranean without overpowering the fresh produce. Don’t skip the paprika if you want that subtle grilled-depth effect even before the vegetables hit the heat.
The Grill Timing That Keeps the Vegetables Tender, Not Limp
Build the Tzatziki First
Start with the dip so the garlic has time to soften and the flavors can settle while the vegetables cook. Grate the cucumber, then squeeze it until it feels almost dry in the towel; if you skip that part, the yogurt thins out and the dip turns runny on the plate. Stir everything together, cover it, and let it sit in the fridge.
Season the Vegetables Evenly
Coat the vegetables in oil and spices until every surface looks lightly glossy. Dry patches will char unevenly, while heavy pools of oil can cause flare-ups on the grill. Thread the vegetables with some room between them so the heat can move around each piece instead of trapping moisture.
Grill Fast and Turn Often
Cook the skewers over high heat for about 10 to 12 minutes total, turning them every 3 minutes. You’re watching for grill marks, softened edges, and a little blistering on the tomatoes. If the vegetables start to collapse before they color, the heat is too low or the skewers are overcrowded.
Serve While the Contrast Still Works
Pull the skewers off the grill and get them to the table right away. The hot vegetables and cold tzatziki are the whole point, and that contrast fades quickly once everything sits. If the skewers cool too long, the vegetables lose their snap and the meal feels flatter.
How to Adapt These Skewers Without Losing the Good Part
Dairy-Free Tzatziki
Use a thick plain coconut or almond yogurt with no added sugar. The flavor will be a little less tangy than Greek yogurt, but the cucumber, garlic, and lemon still carry the dip if you keep it thick and well seasoned.
Make It Heartier for a Main Course
Add halloumi cubes between the vegetables or serve the skewers over couscous, rice, or warm pita. The vegetables stay the star, but the extra starch or cheese turns the dish into something that eats like dinner instead of a side.
Use What You Have on the Grill Tray
Swap in yellow squash, red grape tomatoes, or chunks of eggplant as long as you keep the pieces close in size. Eggplant needs a little more oil and cooks best when cut into sturdy chunks, while zucchini and squash need less time so they don’t turn soft.
Oven or Grill Pan Version
If you don’t have an outdoor grill, use a hot grill pan or broil the skewers on a lined sheet pan, turning once halfway through. You won’t get the same smoky edge, but high heat still gives you color instead of soft, steamed vegetables.
Storage and Reheating
- Refrigerator: Store leftover vegetables and tzatziki separately for up to 3 days. The vegetables soften a bit after chilling, but they still taste good cold or at room temperature.
- Freezer: The skewered vegetables and tzatziki don’t freeze well. The vegetables lose their texture and the yogurt dip separates when thawed.
- Reheating: Reheat the vegetables in a hot skillet or under the broiler just until warmed through. Don’t microwave them if you want to keep any of the char; it turns the vegetables soft and the tomatoes mealy.
Answers to the Questions Worth Asking
Coconut Lime Icebox Cake with Mango Ribbons
Ingredients
Equipment
Method
- Open the refrigerated full-fat coconut cream cans without shaking, then scoop only the solid cream from the top into a chilled bowl (discard the liquid or save for smoothies). Beat with an electric stand mixer on medium-high for 2 minutes until light and fluffy; no temperature is needed.
- Add the powdered sugar, lime zest, lime juice, and vanilla extract, then beat for 30 seconds until incorporated and smooth.
- Use a vegetable peeler to shave the mangoes into long thin ribbons, working around the pit. Set the ribbons aside on paper towels to release water while you assemble the cake.
- Spread a thin layer of coconut cream on the bottom of a 9x13 pan. Lay the graham crackers in a single layer, breaking them as needed to fill gaps.
- Spread one-third of the remaining coconut cream evenly over the crackers, reaching the edges so the layer is uniform.
- Repeat with two more layers of graham crackers and coconut cream, finishing with a cream layer on top. Smooth the surface with an offset spatula.
- Refrigerate uncovered for at least 6 hours or overnight so the graham crackers absorb moisture and soften into a cake-like texture. Keep chilled; a cake pulled at about 4 hours will still have crunch.
- Just before serving, arrange the mango ribbons in loose folds across the top, scatter the toasted shredded coconut, and finish with fresh mint leaves. Slice with a sharp knife dipped in hot water and wiped clean between cuts.